Docusign Configuration
DocuSign is a service that enables customers to electronically sign any type of document. Once you are registered with DocuSign, you can configure your AppBuilder application to use it.
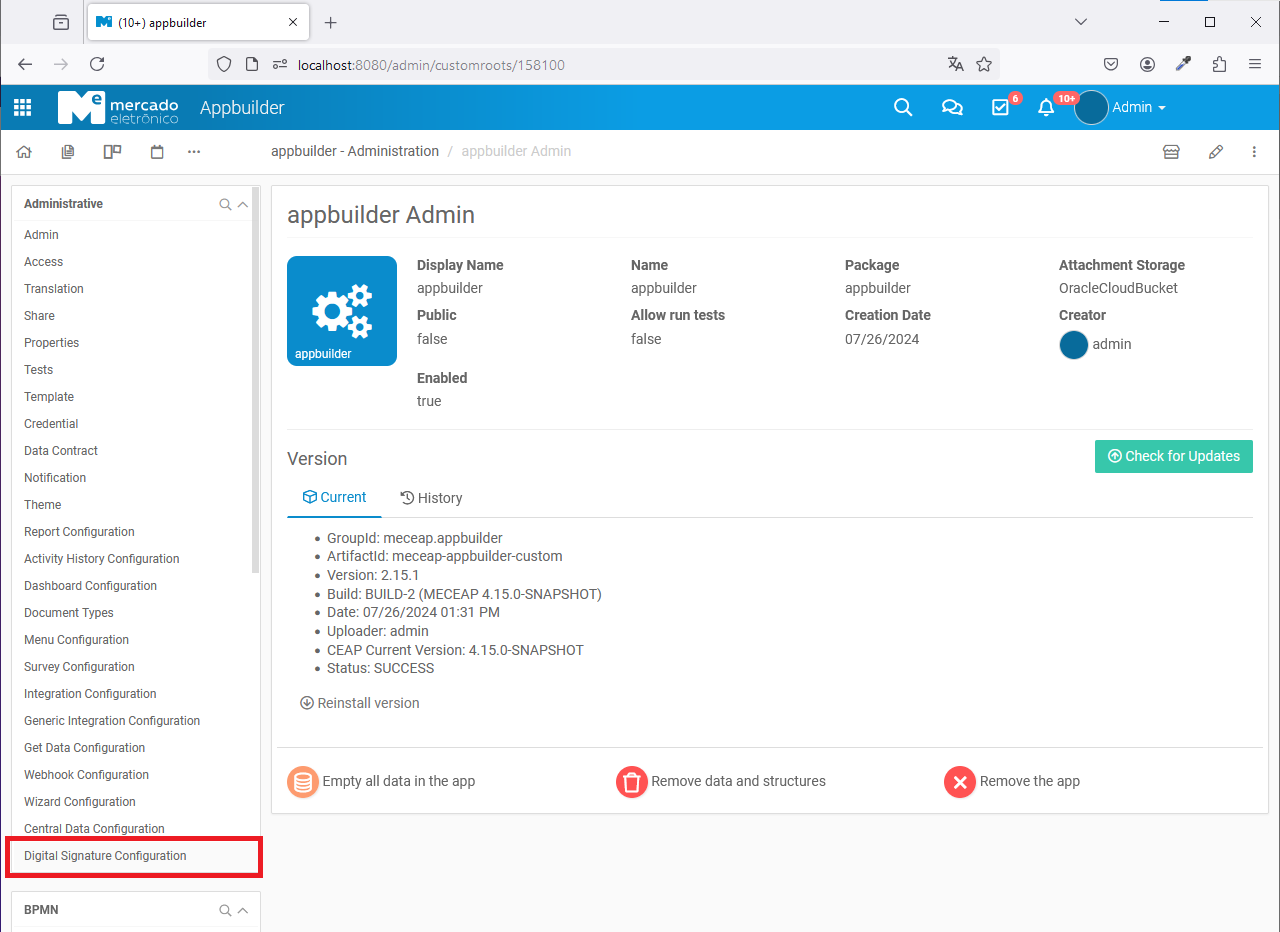
In your app, go to the admin page and open the Digital Signature Configuration under the Administrative Menu.
On the Digital Signature Configuration page, choose DocuSign as the signing provider and select one of the available authentication types.
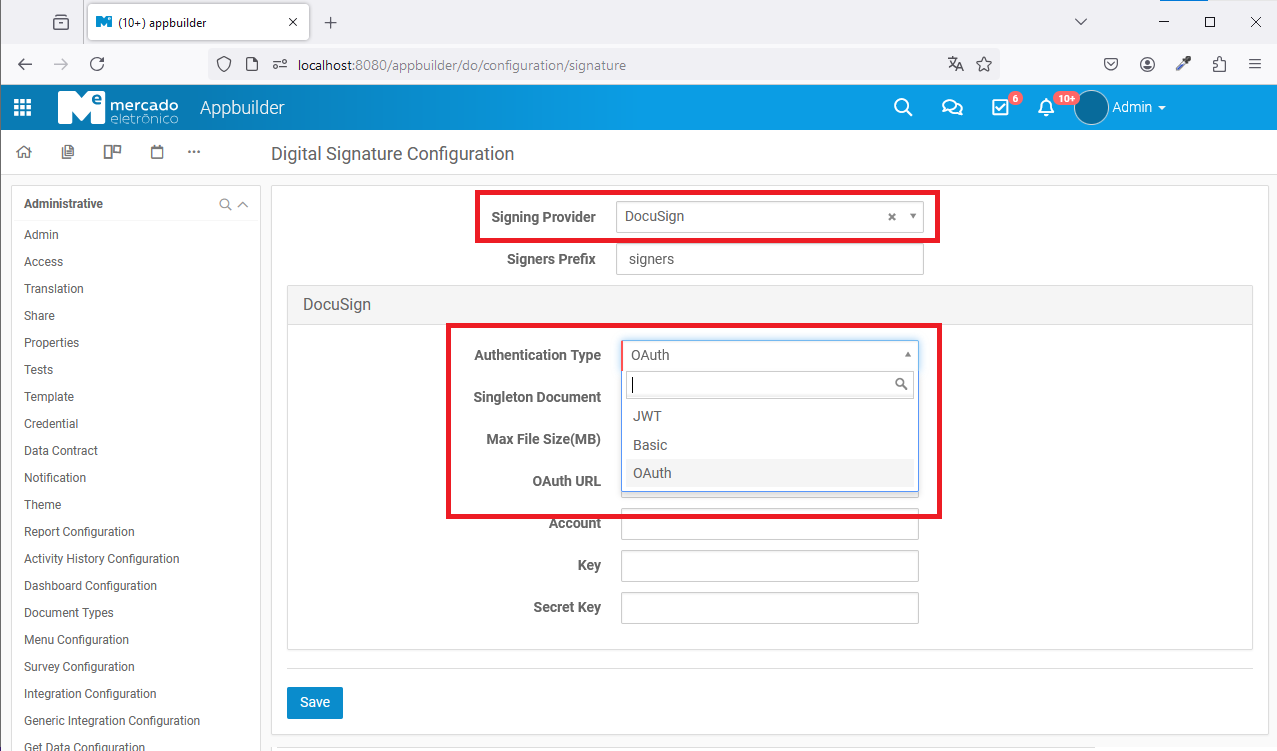
There are 3 types of configuration to use with DocuSign: Basic Authentication (deprecated), OAuth Grant and JWT Grant.
Follow the steps below to configure your type of integration: - Basic Authentication, has been deprecated and its not supported anymore. Don't use it and migrate your app to one of the other configurations available if your still using it - OAuth Grant - JWT Grant
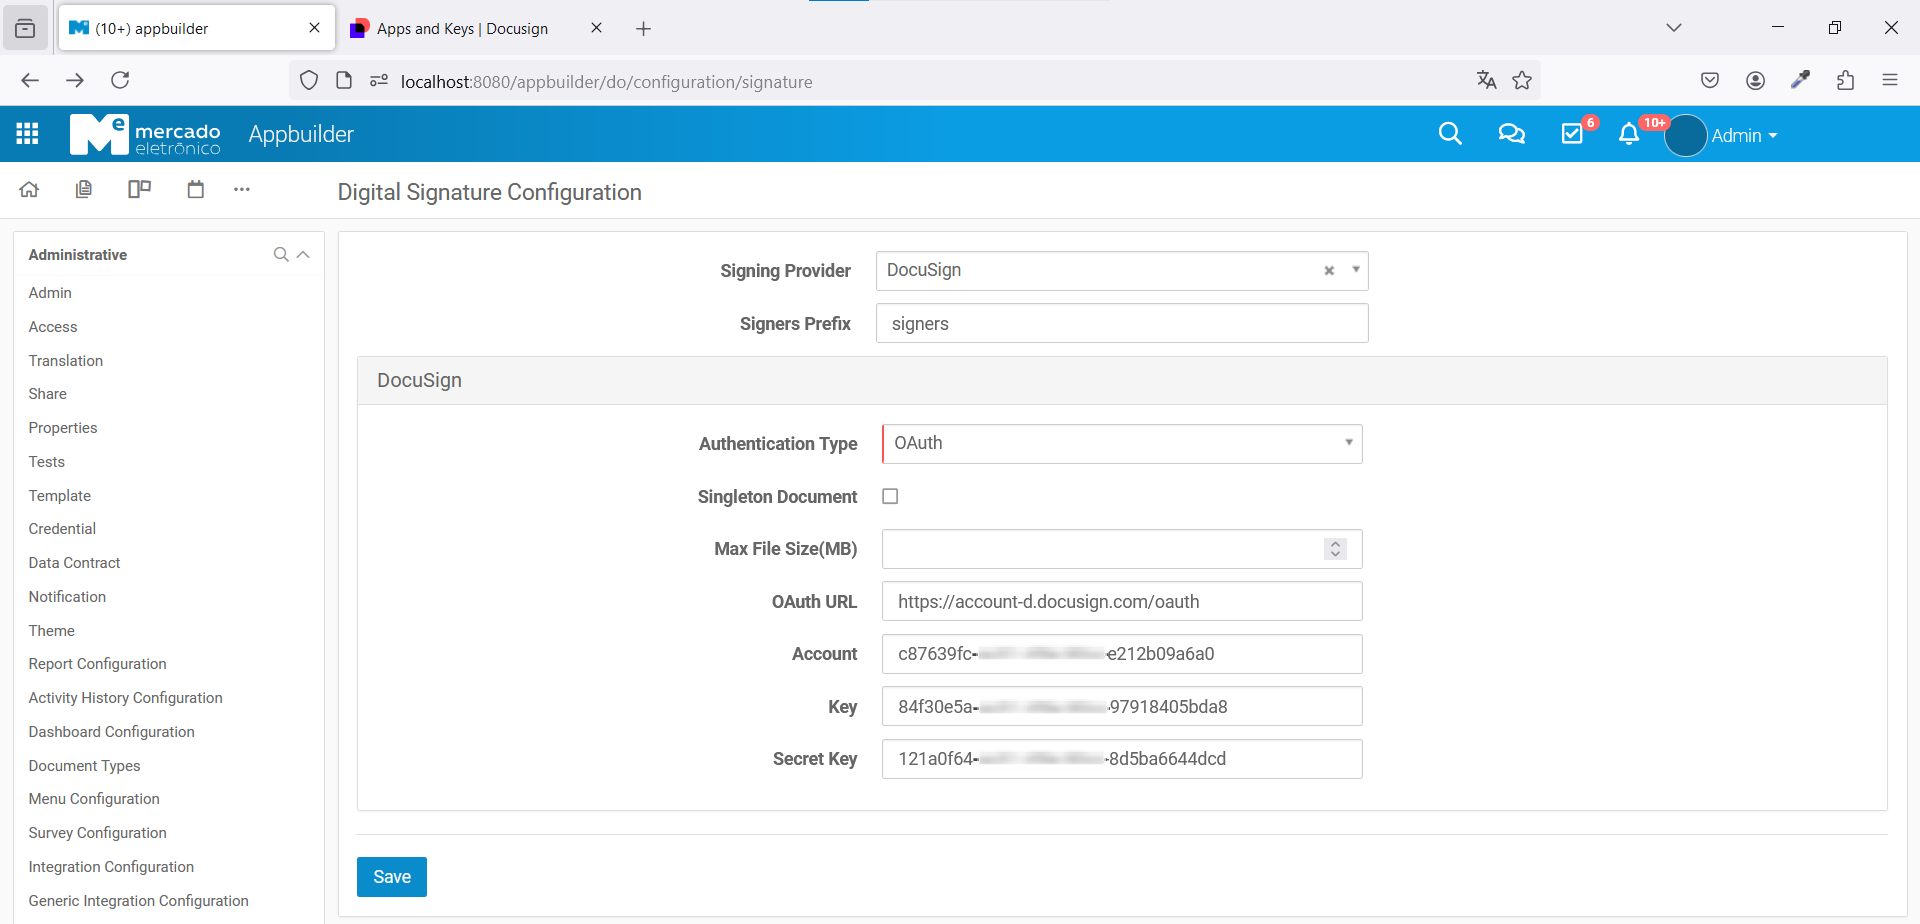
OAuth Grant Configuration
In your OAuth configuration, you will have the following fields:
-
Singleton Document -
Max File Size (MB) -
OAuth URLhttps://account.docusign.com/oauth or https://account-d.docusign.com/oauth if you’re using a developer account -
AccountYour API Account ID, provided by the DocuSign service -
KeyYour app integration key, provided by the DocuSign service -
Secret KeyA secret key created at the DocuSign service
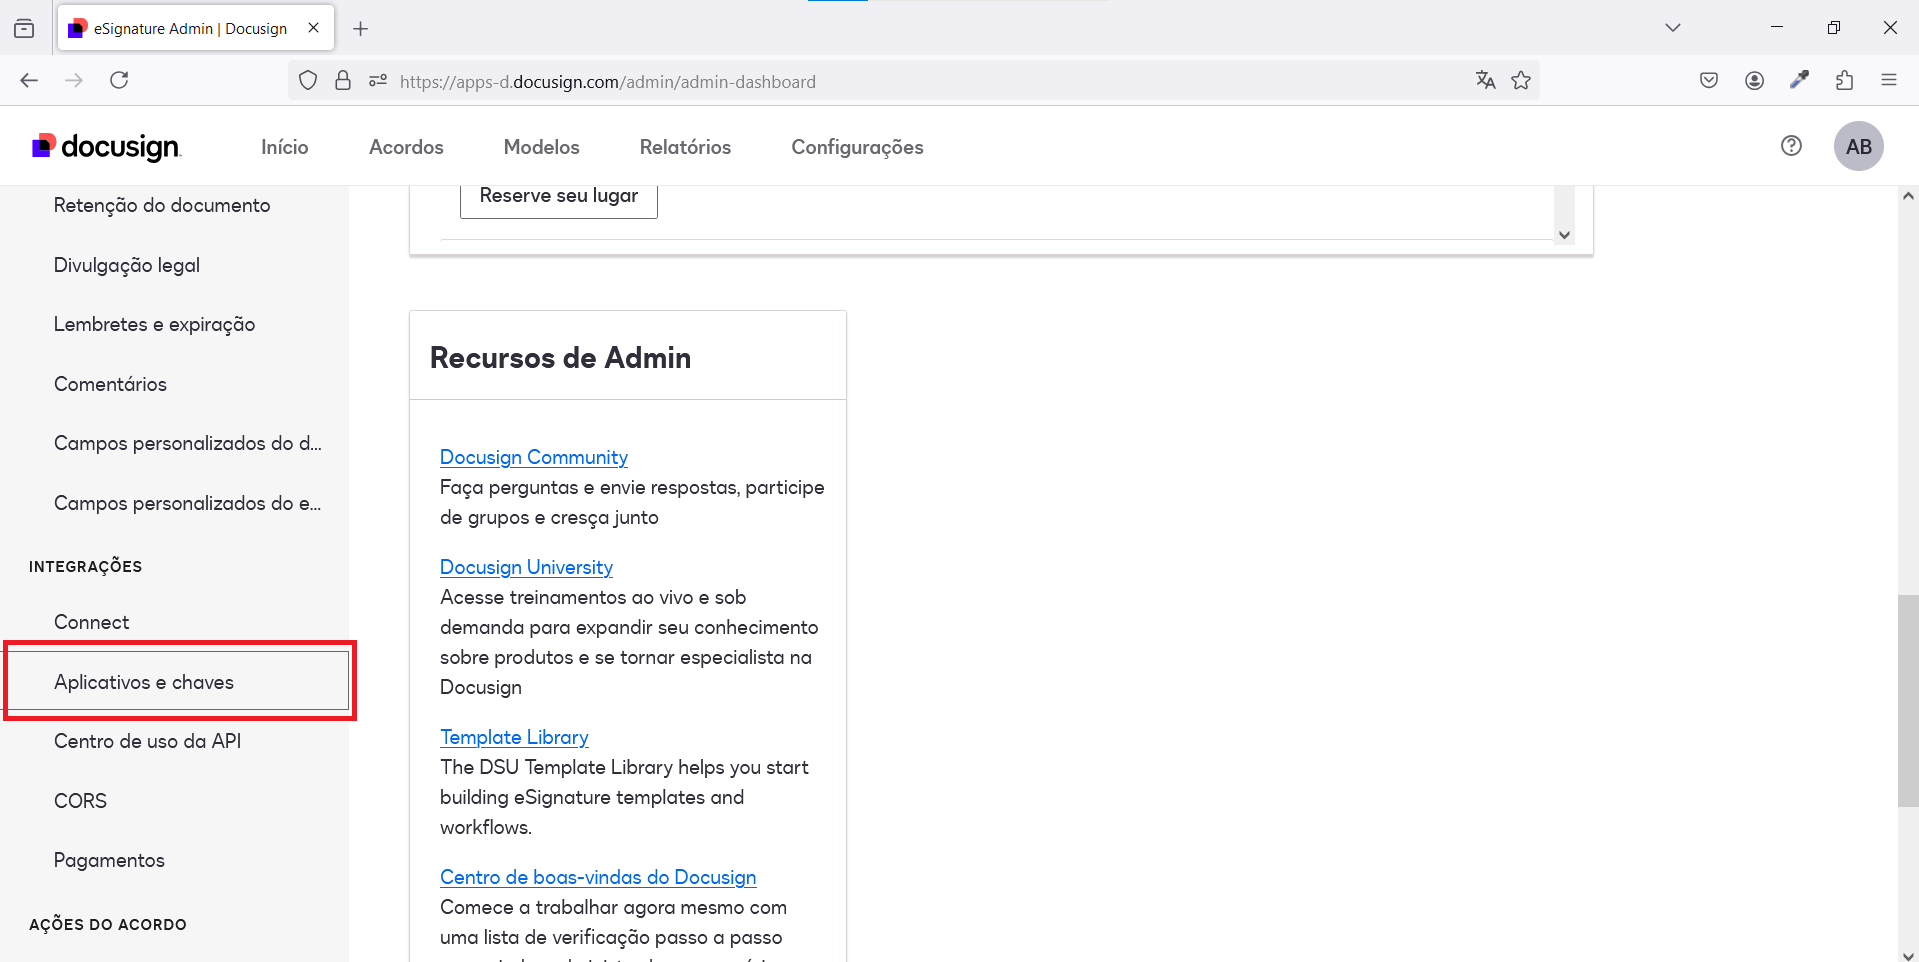
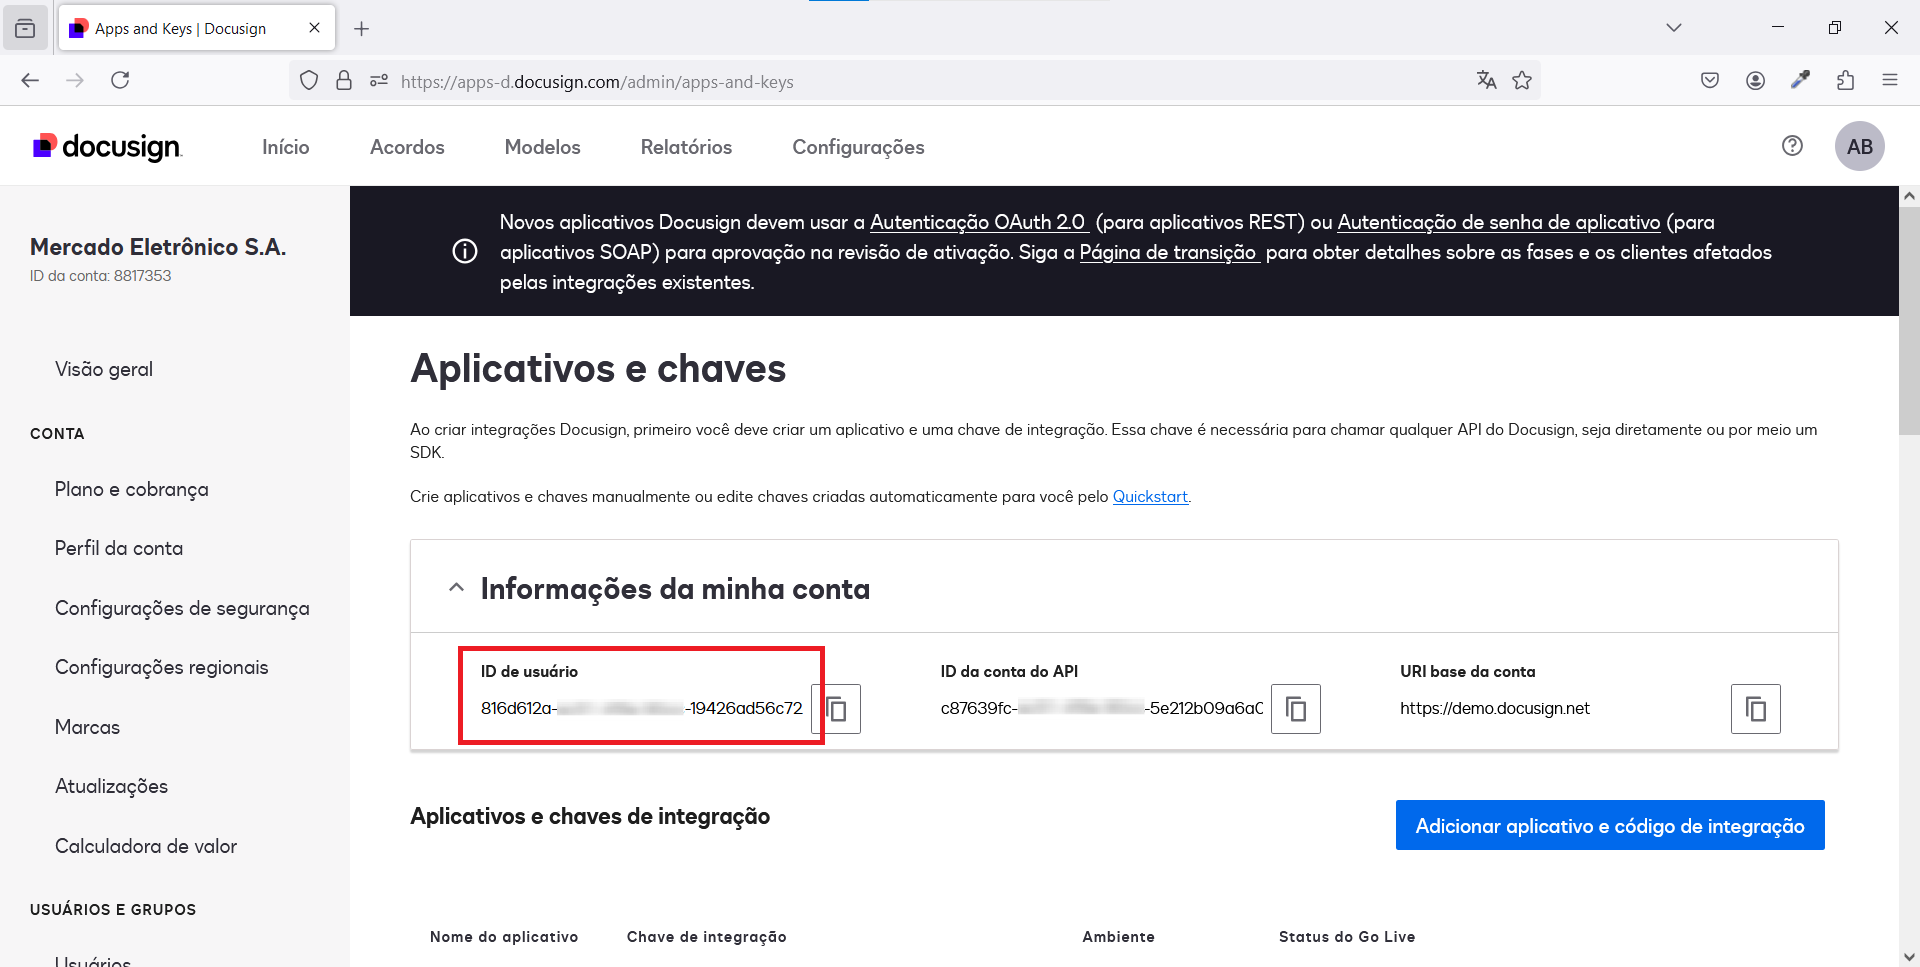
On your DocuSign home page, go to the Configurations page and open the Apps and Keys option listed in the Integrations menu.
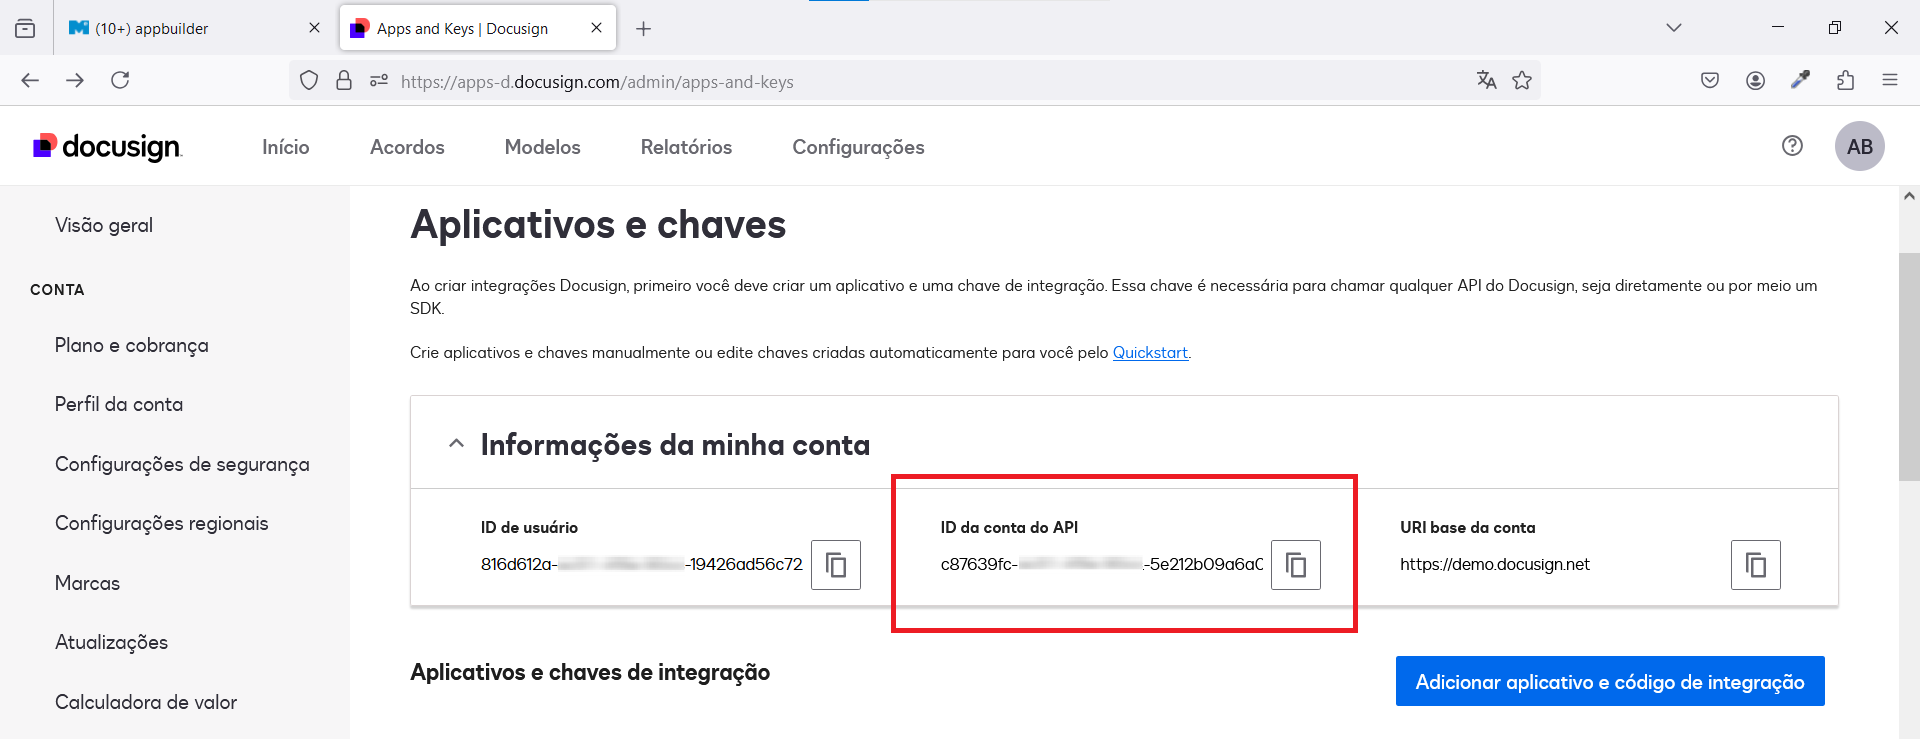
In the Apps and Keys page, you’ll find your API Account ID, which must be used as your Account in your Digital Signature Configuration.
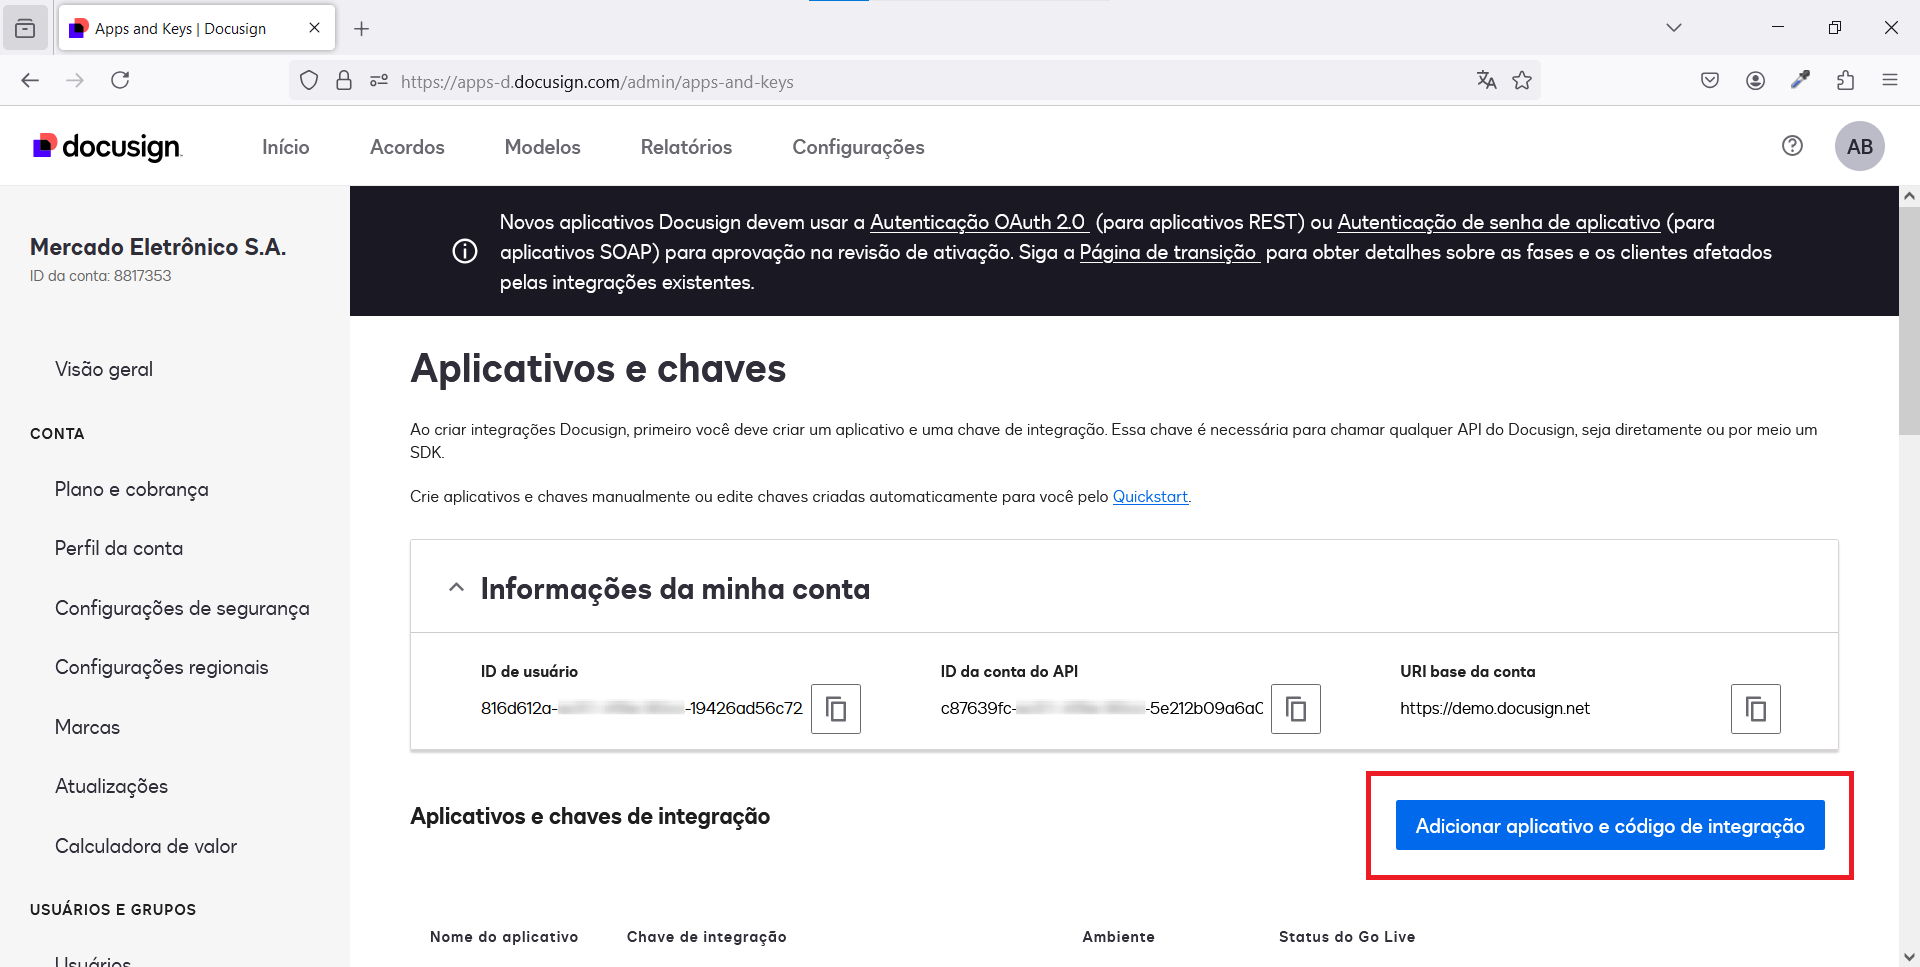
Then create a new app or use an existing one.
In your new app’s Edit page, you’ll find the Integration Key, which corresponds to the Key field in your Digital Signature.
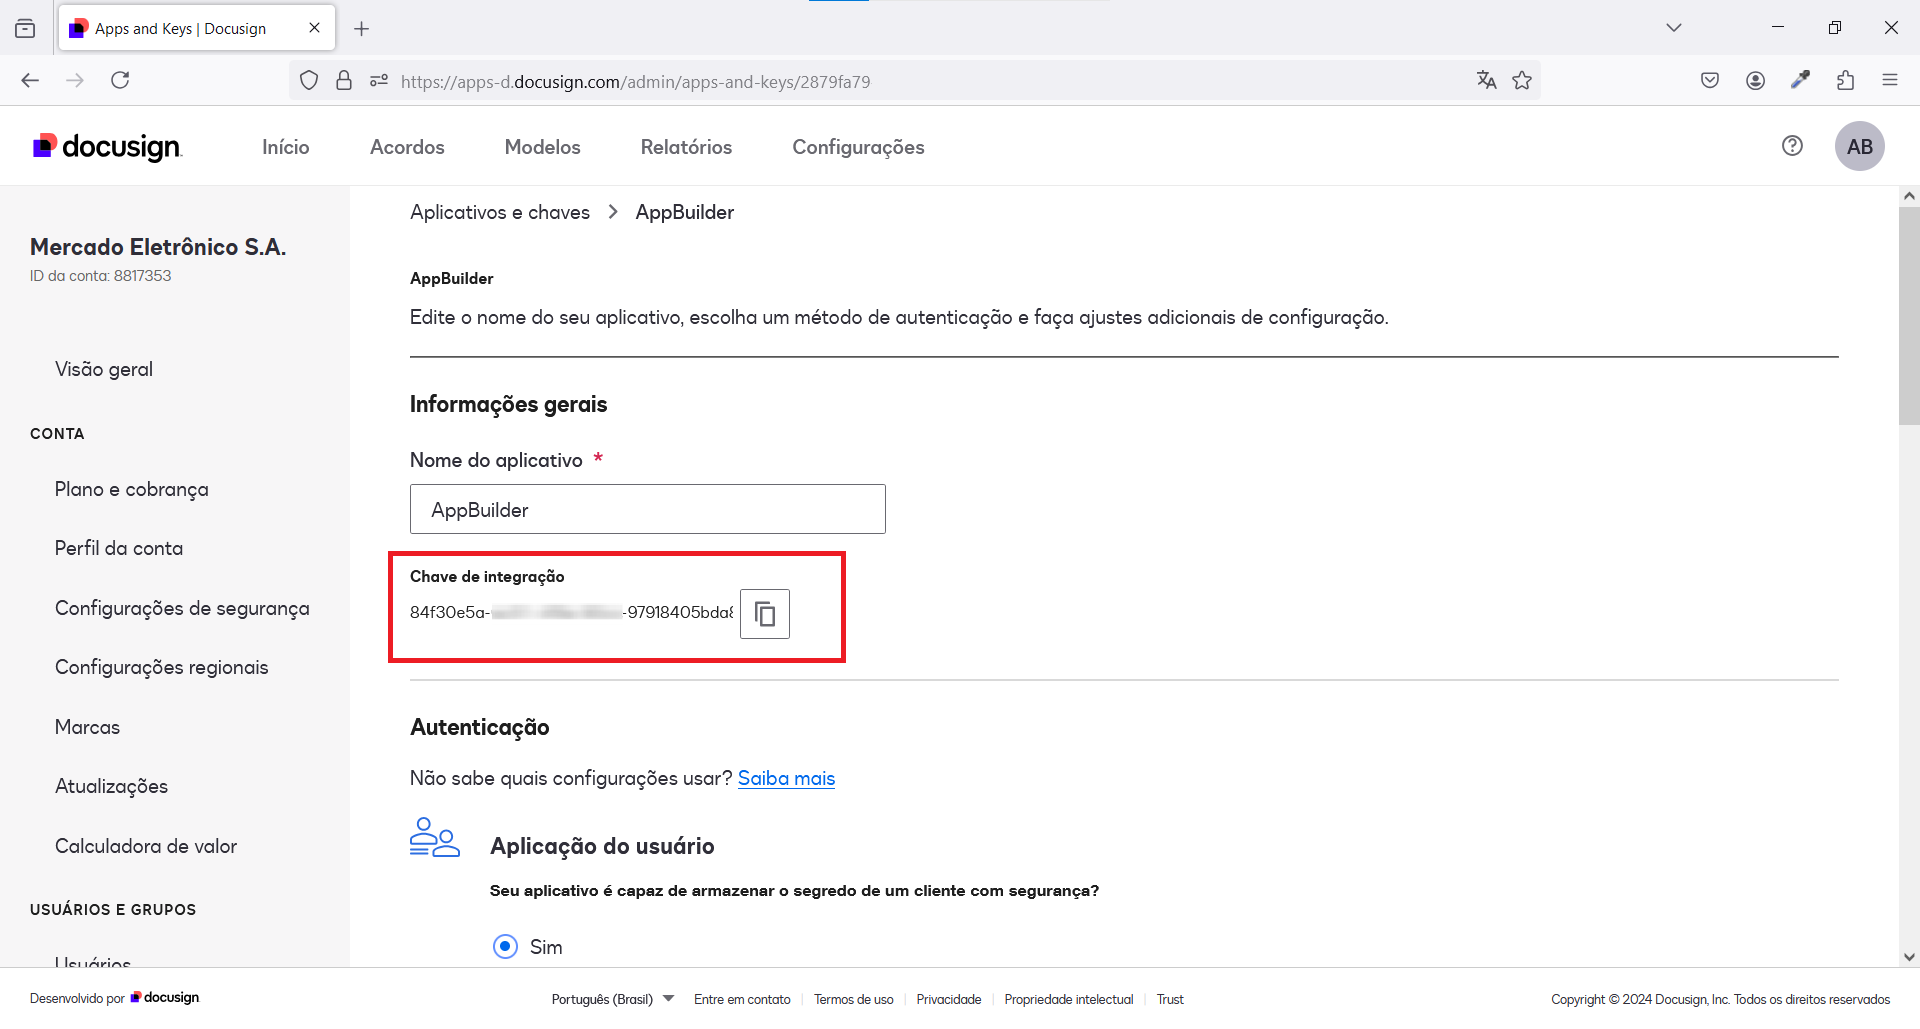
Also in your app’s Edit page, generate a secret key. The generated value must be used to fill the Secret Key field in your Digital Signature Configuration.
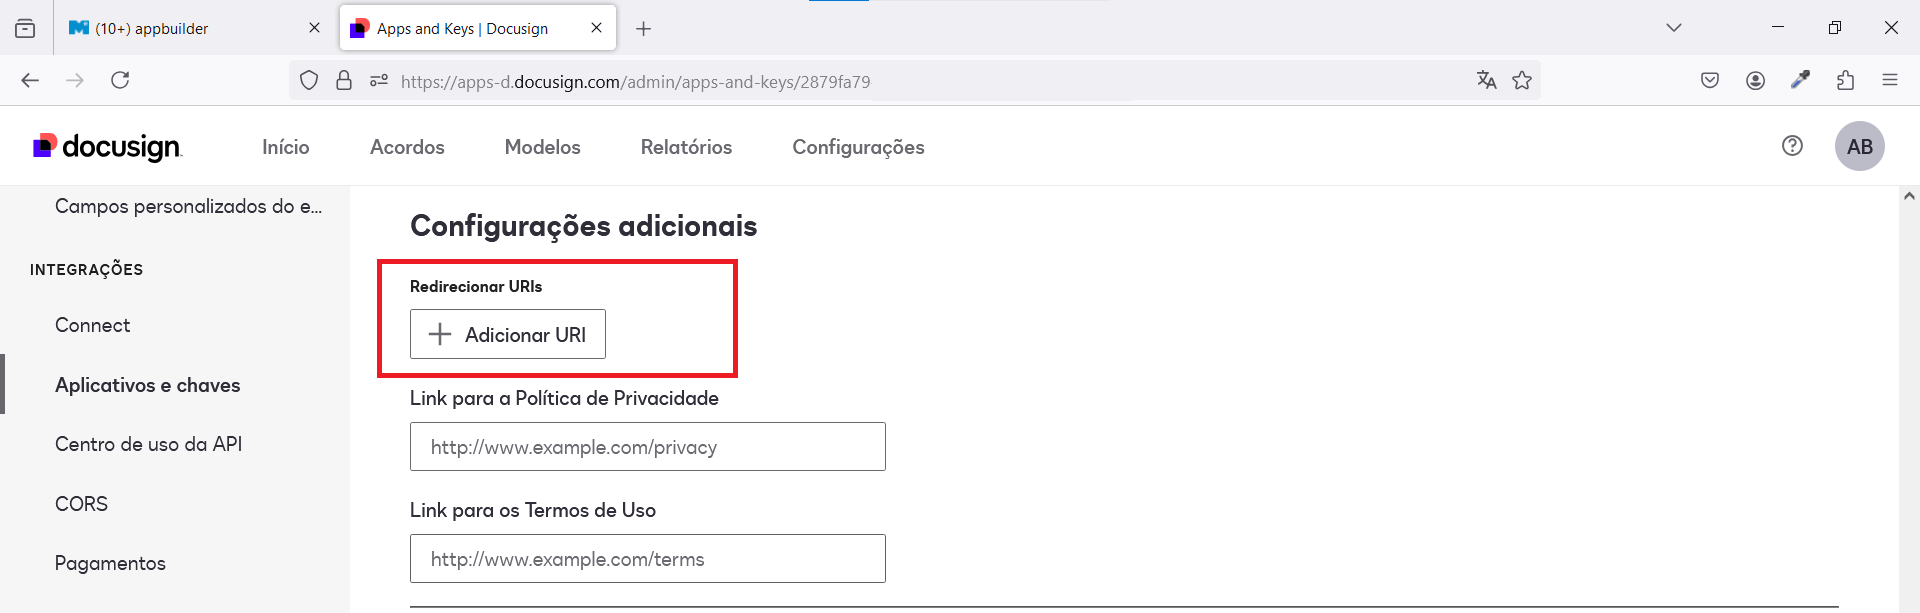
The last configuration you must make in your DocuSign account is adding your callback to your Redirect URI’s list.
In the Edit option of your app, configure the callback URL, which must follow the pattern:
[INSTANCE_URL]/[APPLICATION_NAME]/do/sign/authentication/callback
or with wildcards to accept any app from the same Miisy instance:
[INSTANCE_URL]/*
Examples:
http://localhost:8080/appbuilder/do/sign/authentication/callback
https://qa.miisy.me/timeapps/do/sign/authentication/callback
https://me.miisy.me/aplicativo/do/sign/authentication/callback
https://www.me.miisy.me/aplicativo/do/sign/authentication/callback
In case of multiple apps in the same server using the same Docusign client:
https://me.miisy.me/*
https://www.me.miisy.me/*
Warning
For production environments always have the 2 urls, with and without www, configured as callback.
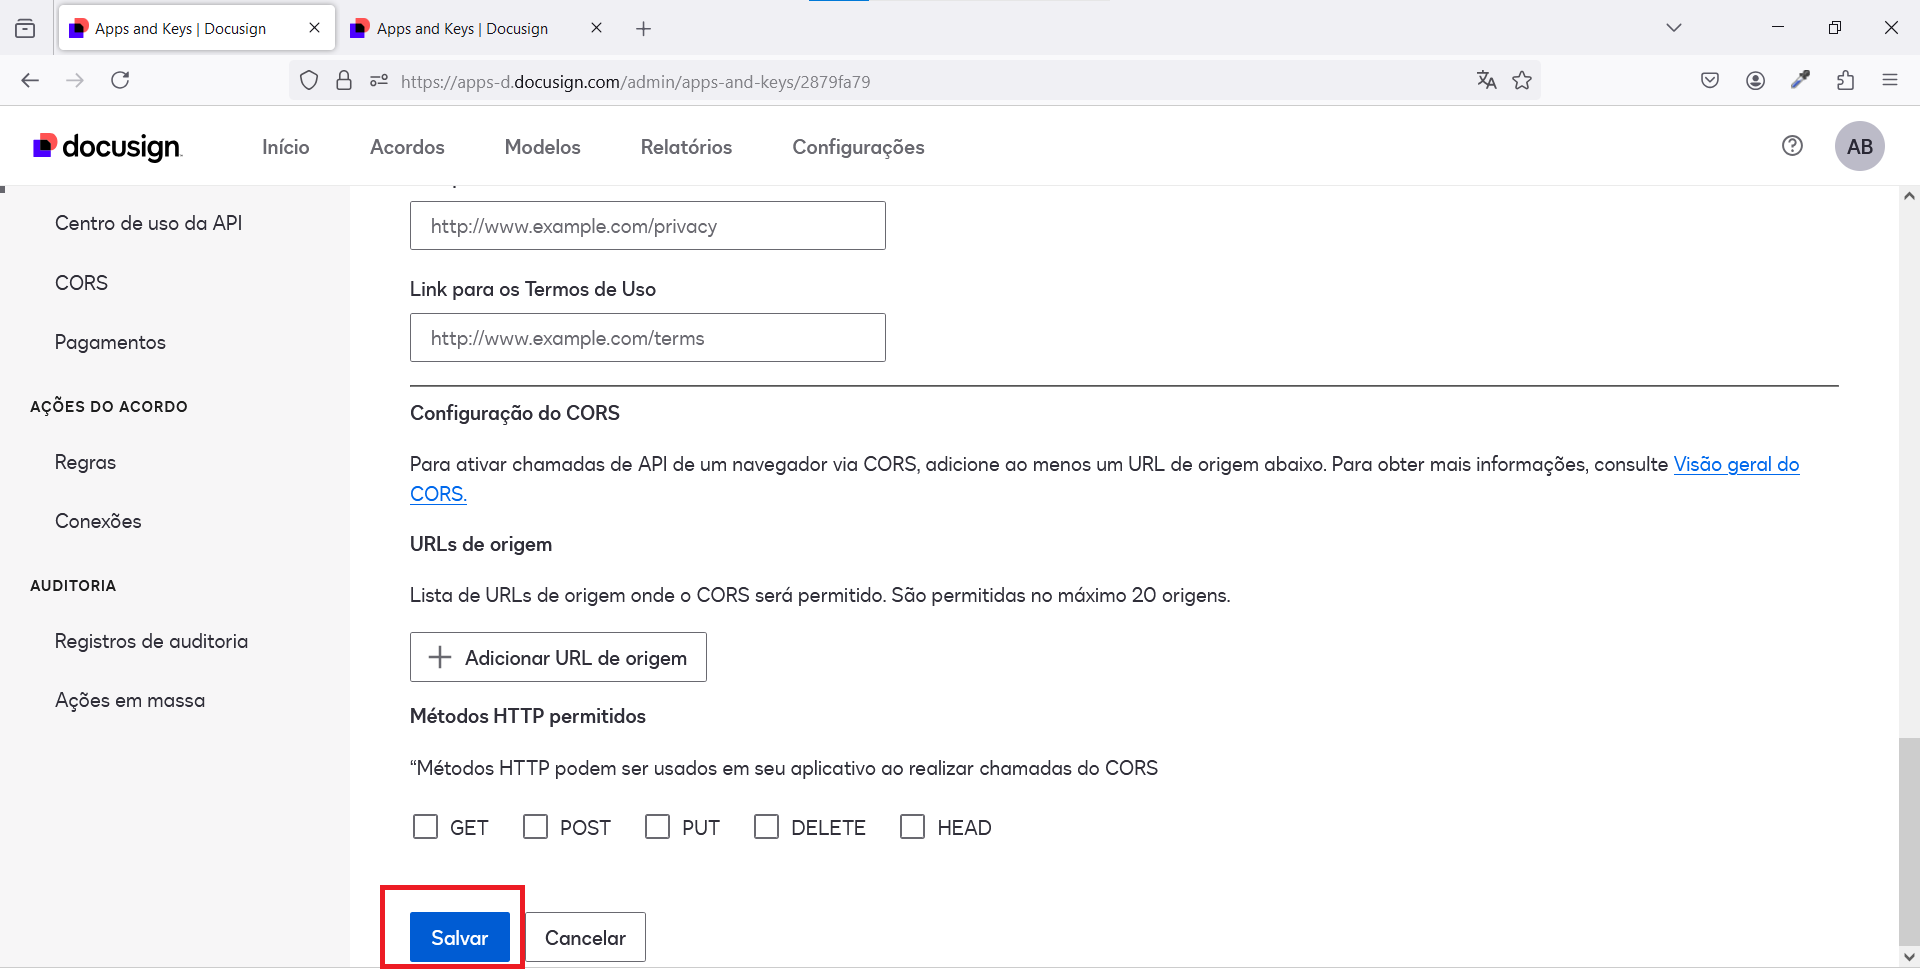
After these steps, you can save your configurations.
In the end, your OAuth Digital Signature Configuration should look like this:
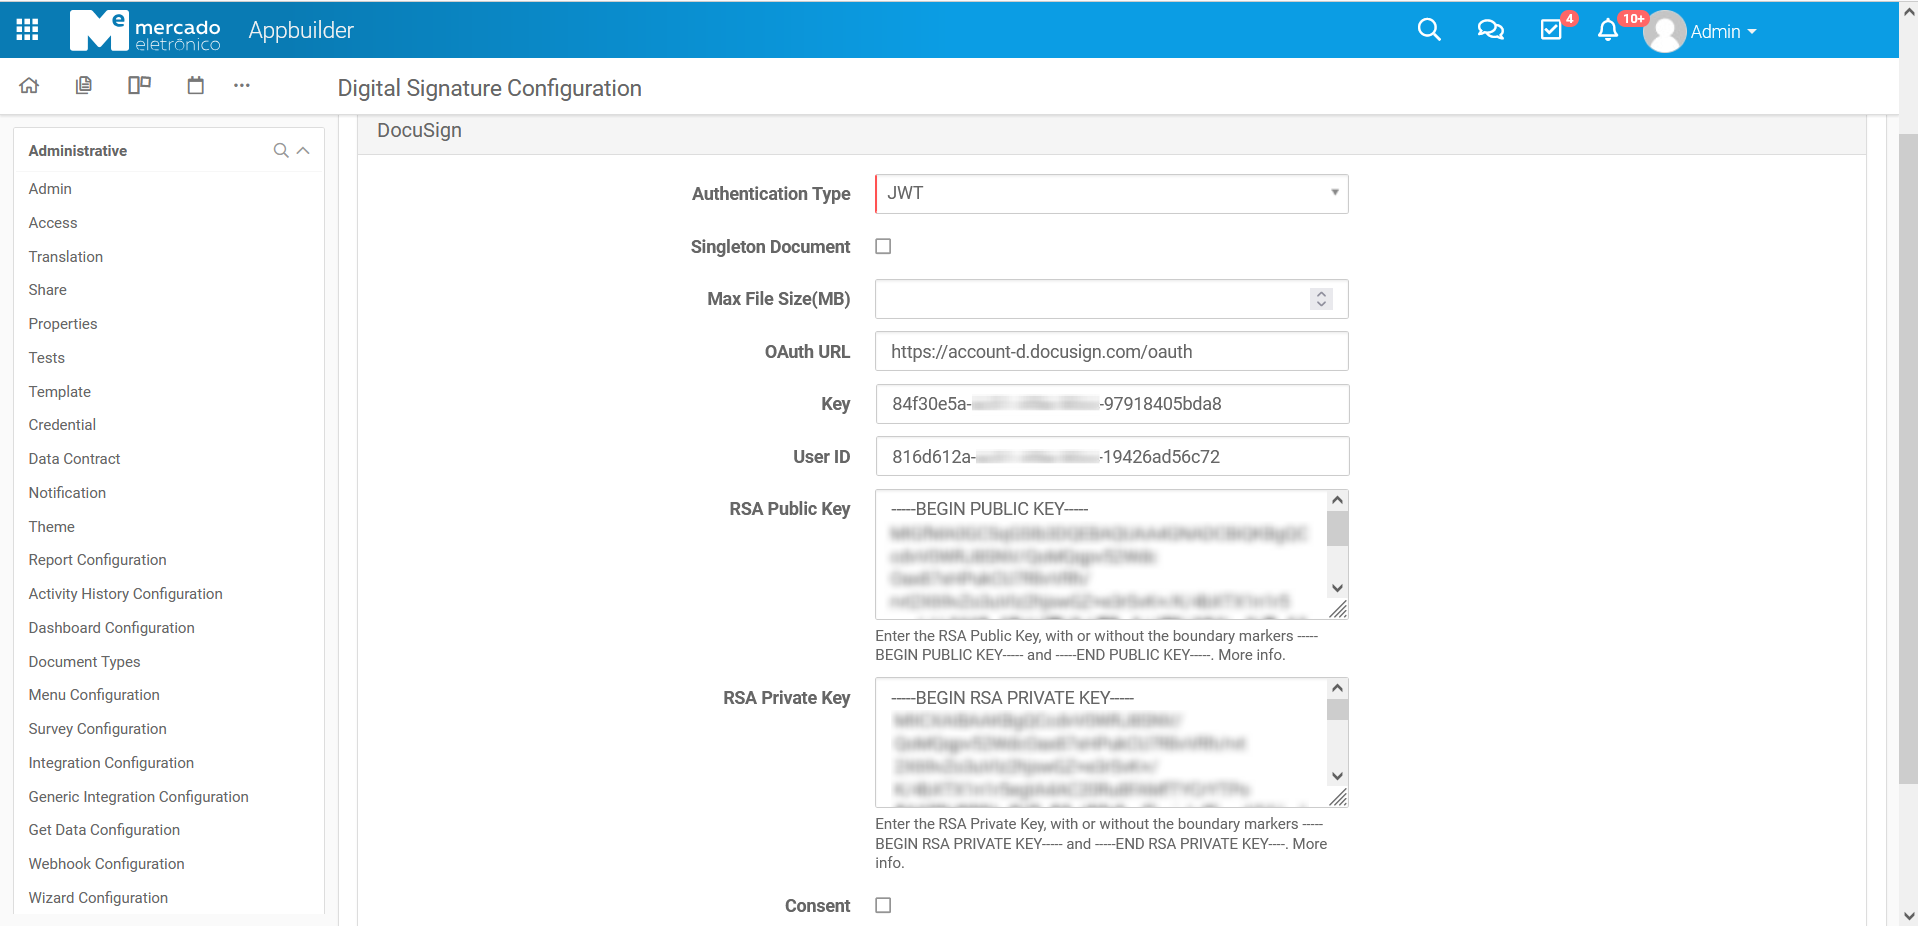
JWT Grant Configuration
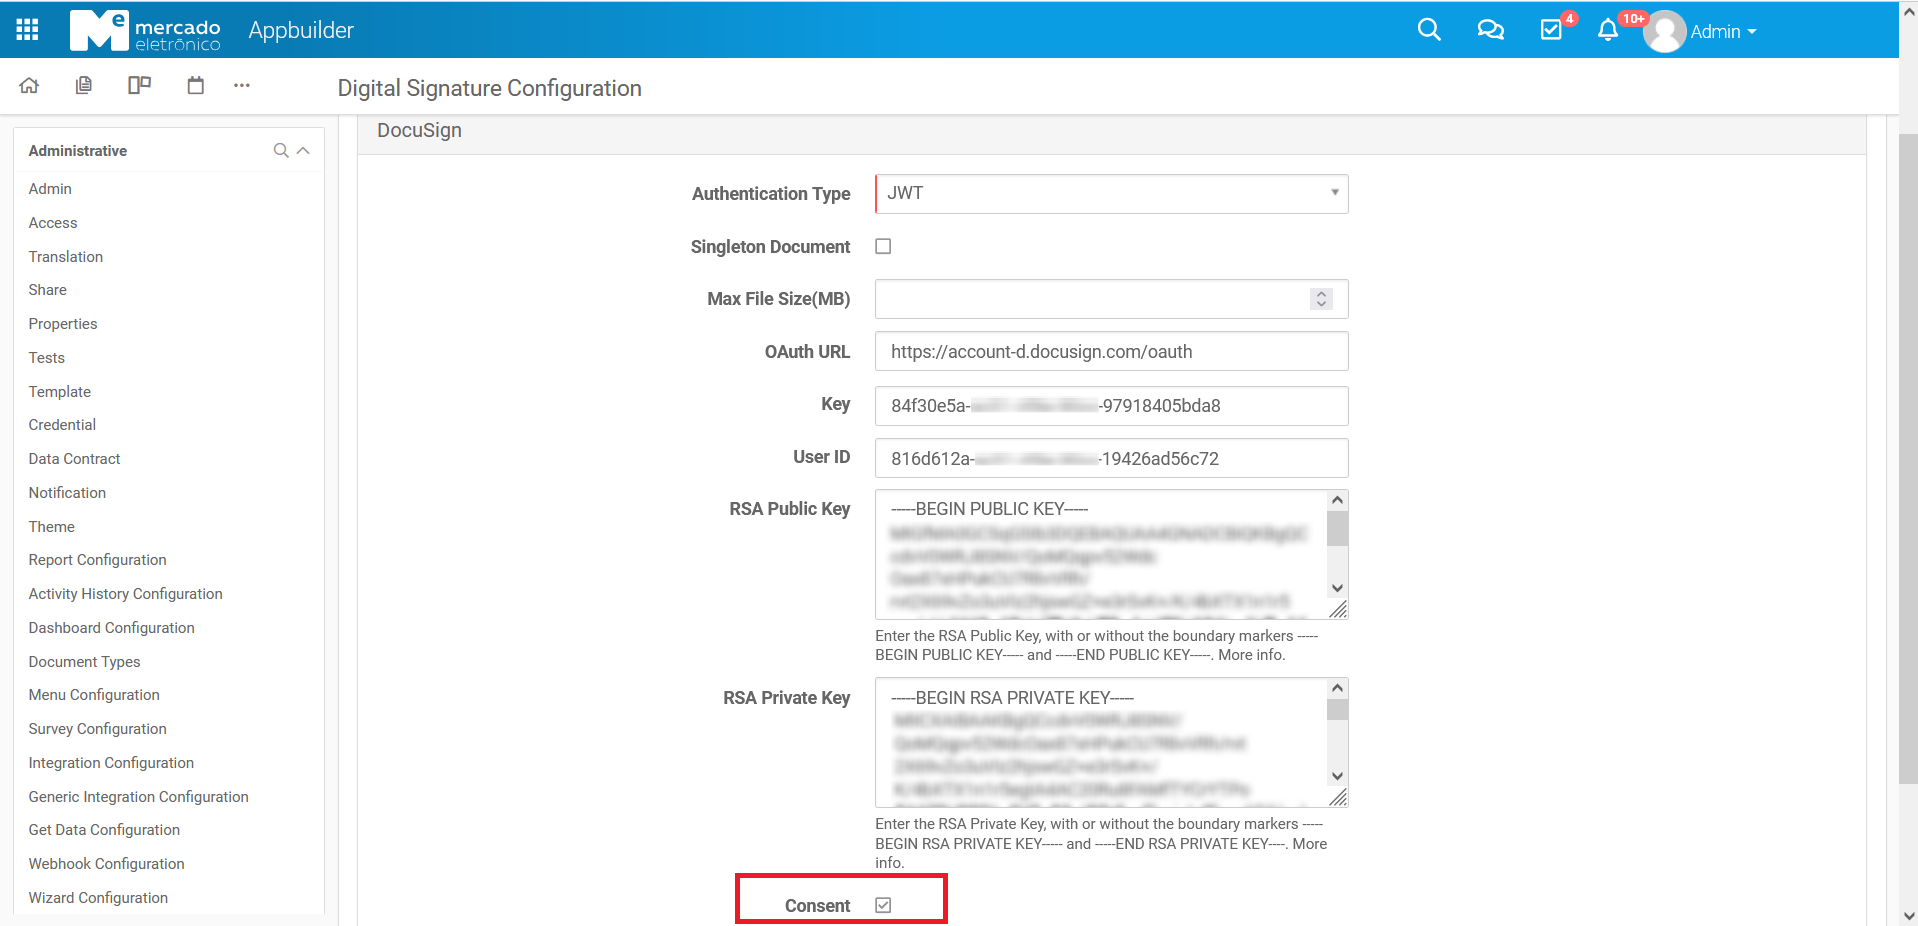
Selecting the JWT Authentication Type, you’ll have to fill the following fields:
-
Singleton Document -
Max File Size (MB) -
OAuth URLhttps://account.docusign.com/oauth or https://account-d.docusign.com/oauth if you’re using a developer account -
KeyYour app integration key, provided by the DocuSign service -
User IDYour user ID, provided by the DocuSign service -
RSA Public KeyA RSA Public Key generated at the DocuSign service -
RSA Private KeyA RSA Private Key generated at the DocuSign service -
ConsentWhether your app can make requests to the DocuSign service
On your DocuSign home page, go to the Configurations page and open the Apps and Keys option listed in the Integrations menu.

In the Apps and Keys page, you’ll find your User ID, which must be used in your Digital Signature Configuration.
Create a new app.
In your new app’s Edit page, you’ll find the Integration Key, which corresponds to the Key field in your Digital Signature Configuration.
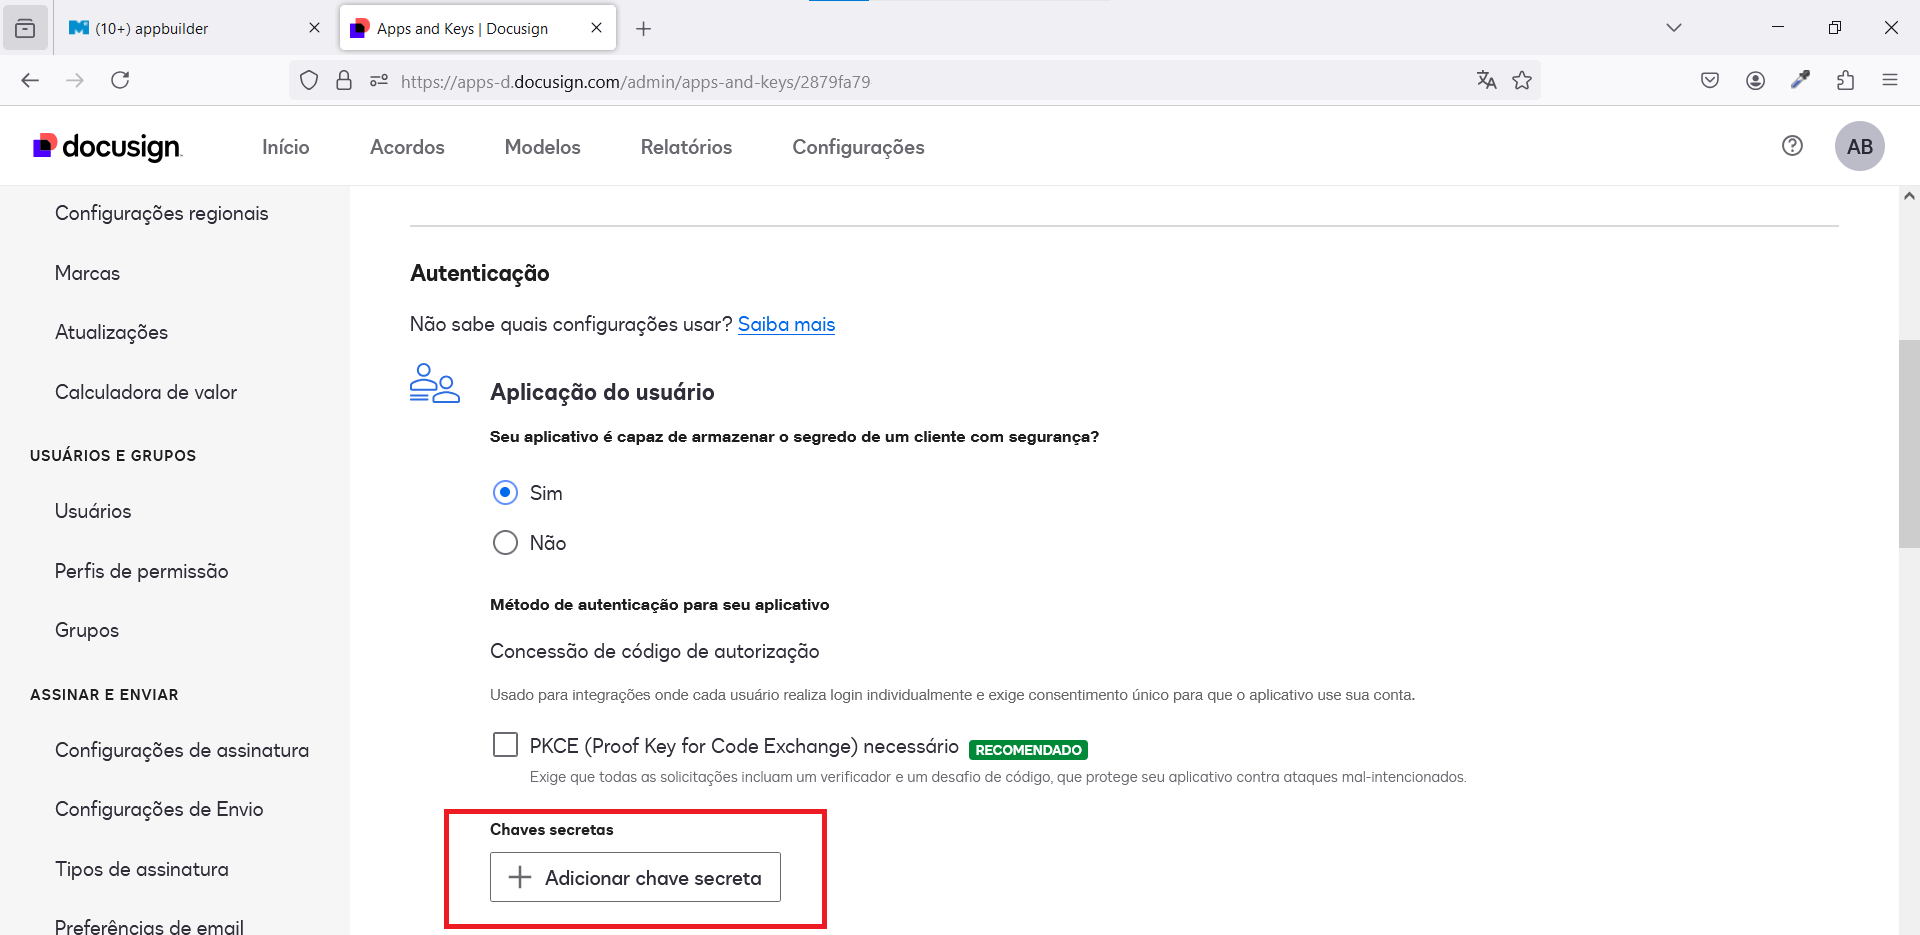
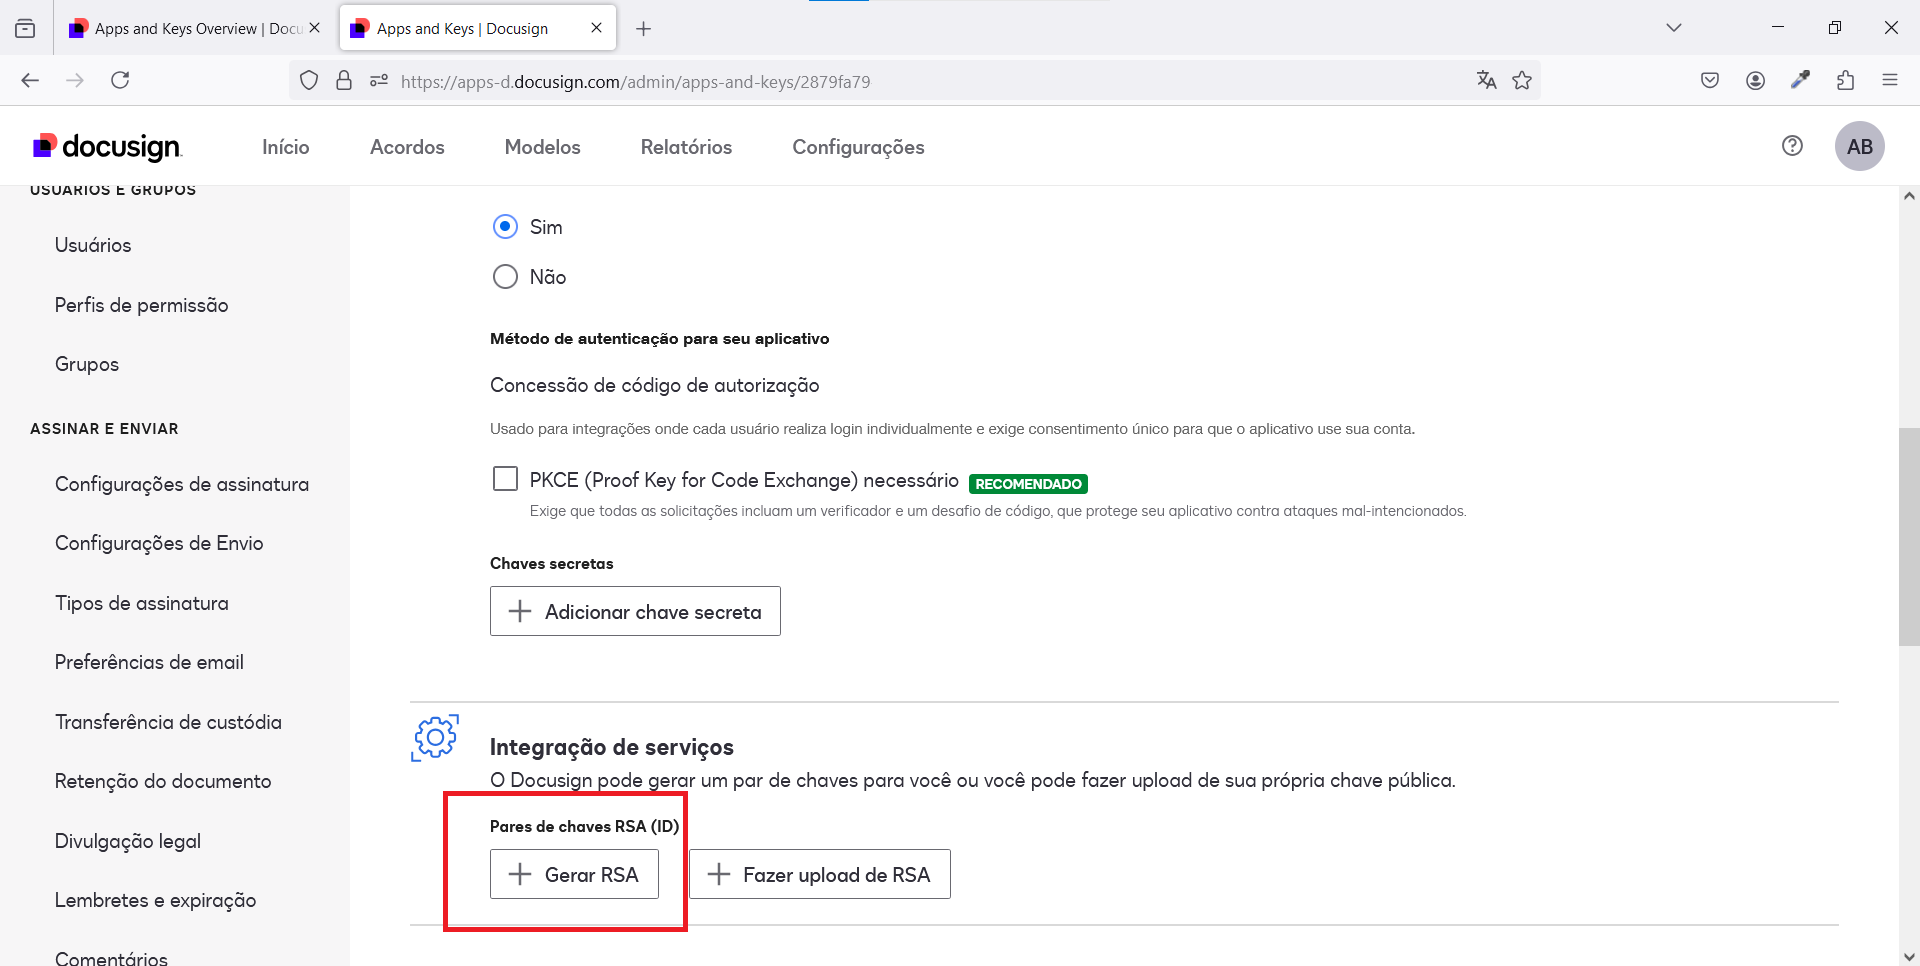
In the same page, click to generate a pair of RSA keys. Please be aware that this key pair will not be available for reference after the window is closed. So these values should be stored in a safe place. Also, use these values to fill the RSA public key and RSA private key fields in your Digital Signature Configuration.
At this step, you can use the buttons next to the Public and Private Keys to copy the full key values, including the key boundary markers which are -----BEGIN PUBLIC KEY----- and -----END PUBLIC KEY----- for the public key and -----BEGIN RSA PRIVATE KEY----- and -----END RSA PRIVATE KEY----- for the private key.
You can also ignore the key boundary markers and just use the text between them to populate the RSA public key and RSA private key fields in your Digital Signature Configuration. Either way should work.

The last configuration you must make in your DocuSign account is adding your Consent callback to your Redirect URI’s list.
In the Edit option of your app, configure the Consent callback URL, which must follow the pattern:
[INSTANCE_URL]/[APPLICATION_NAME]/do/sign/authentication/consent/callback
or with wildcards to accept any app from the same Miisy instance:
[INSTANCE_URL]/*
Examples:
http://localhost:8080/appbuilder/do/sign/consent/callback
https://qa.miisy.me/timeapps/do/sign/consent/callback
https://me.miisy.me/aplicativo/do/sign/consent/callback
https://www.me.miisy.me/aplicativo/do/sign/consent/callback
In case of multiple apps in the same server using the same Docusign client:
https://me.miisy.me/*
https://www.me.miisy.me/*
Warning
For production environments always have the 2 urls, with and without www, configured as callback.
After these steps, you can save your configurations.
Your AppBuilder Digital Signature Configuration should look like this:
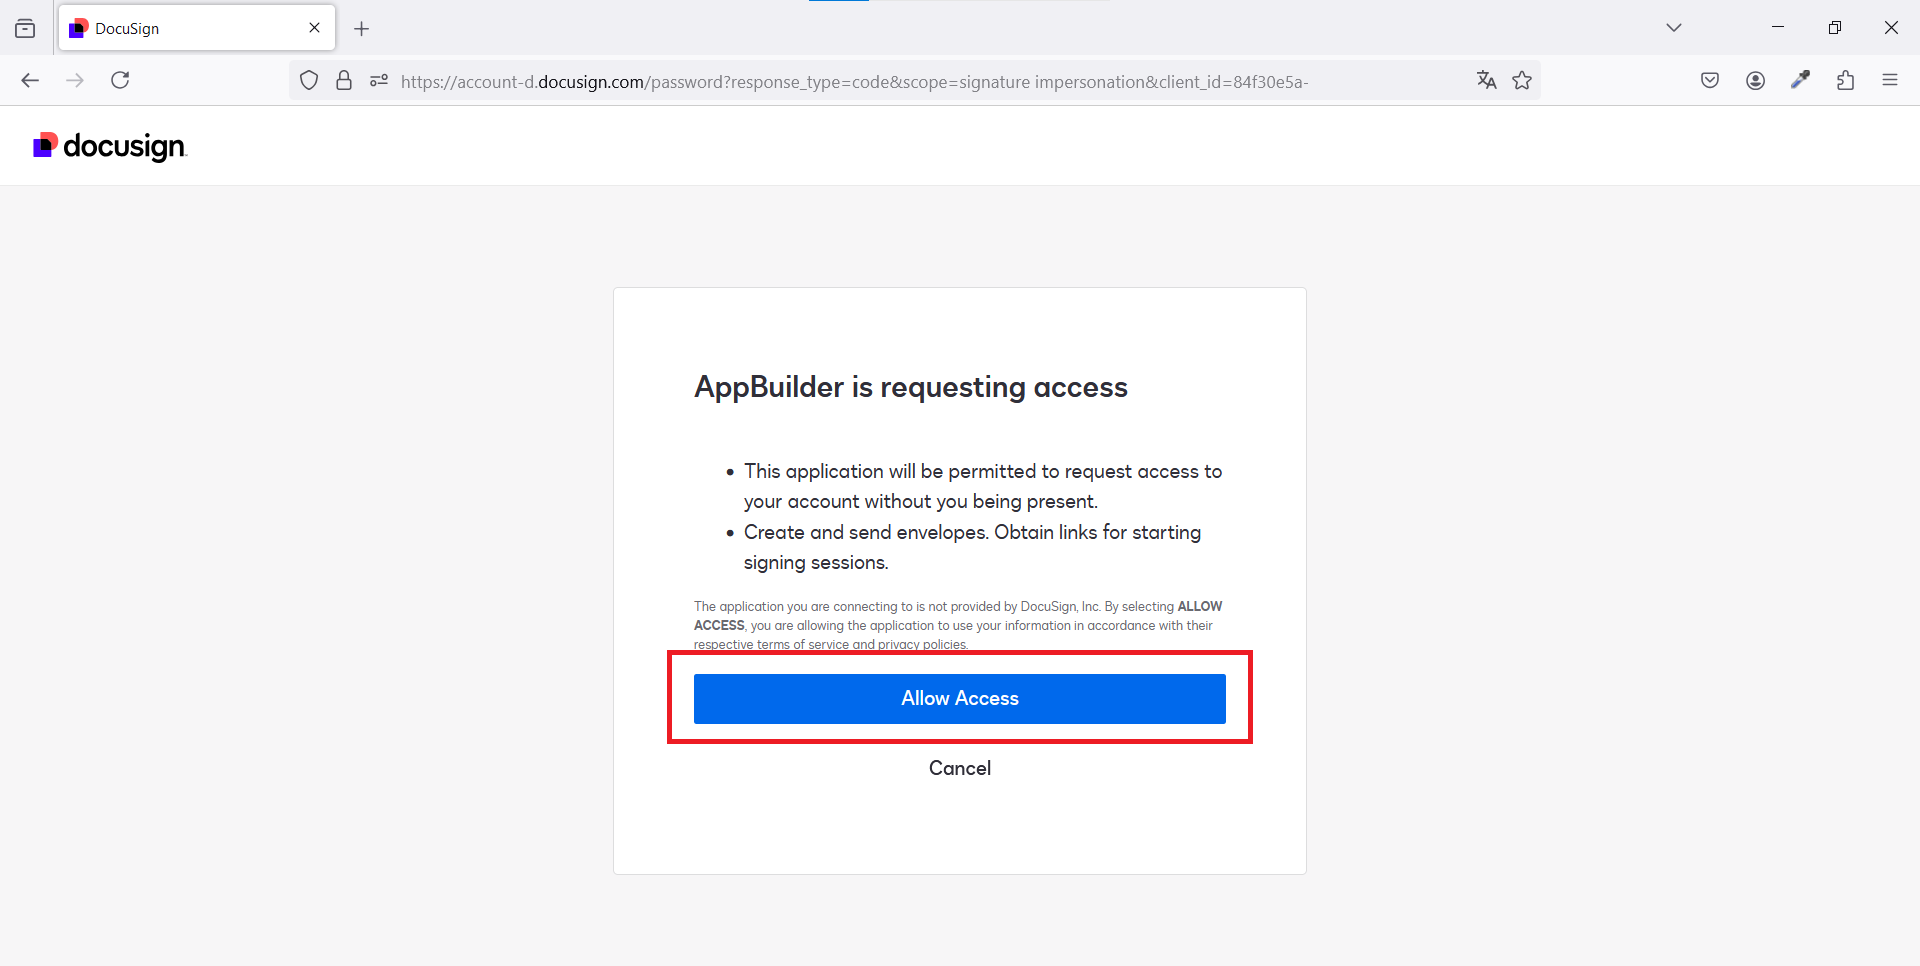
Once the configuration in your DocuSign account and in your applications is done, you can access the Consent endpoint, which is the same as the redirect URI you have configured in your DocuSign account, without the /callback part:
[INSTANCE_URL]/[APPLICATION_NAME]/do/sign/authentication/consent
Examples:
https://qa.miisy.me/timeapps/do/sign/authentication/consent
http://localhost:8080/appbuilder/do/sign/authentication/consent
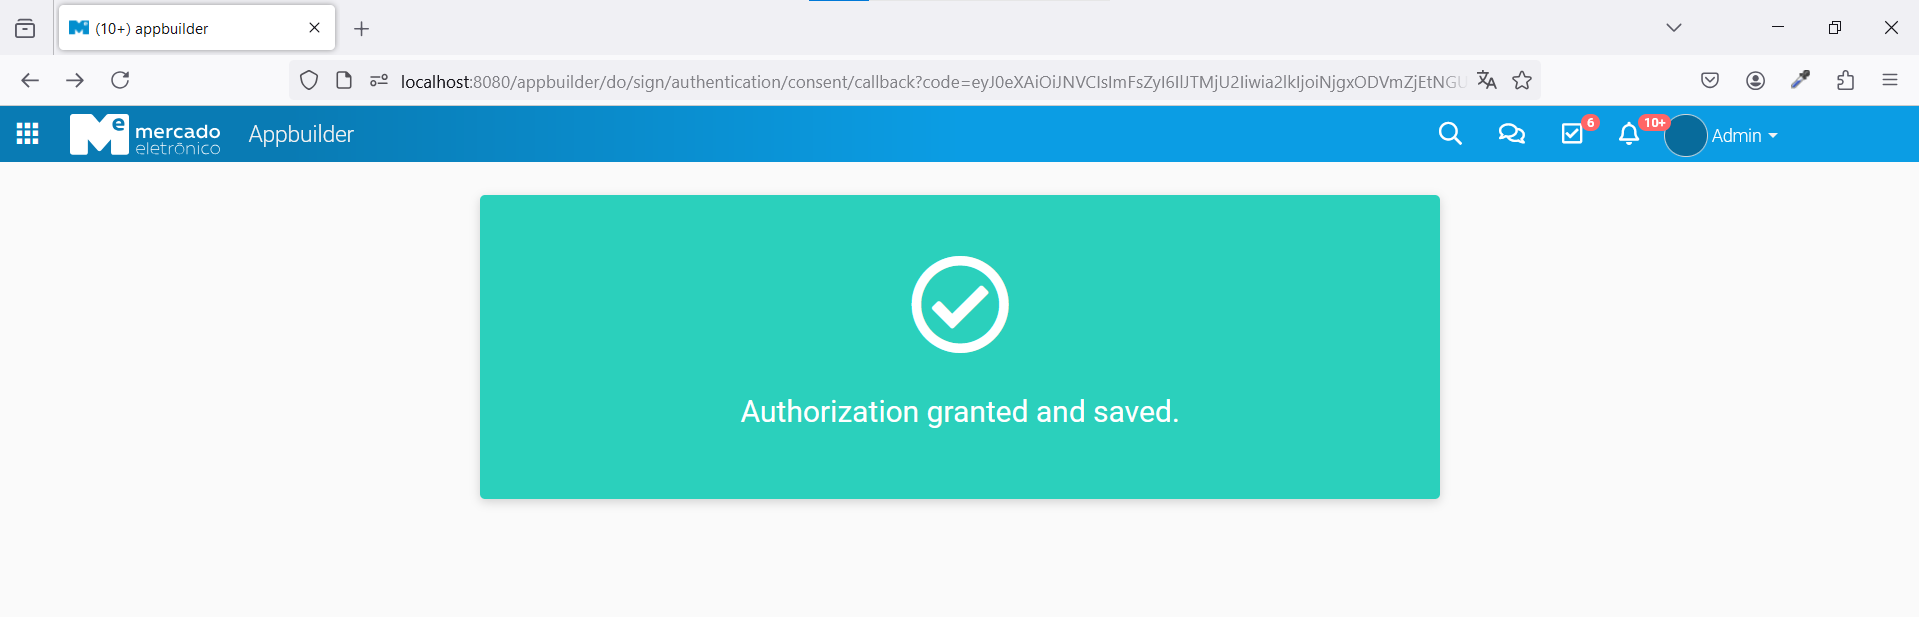
This will redirect you to a DocuSign page where you will be asked to allow your AppBuilder application to use your DocuSign account. If the consent is denied, you won’t be able to send digital signatures.
After consent is granted, the URL will redirect to your app, and you can check this information in your Digital Signing Configuration.
Once your application has the consent in the JWT Authentication Type, you can make digital signings at any time.
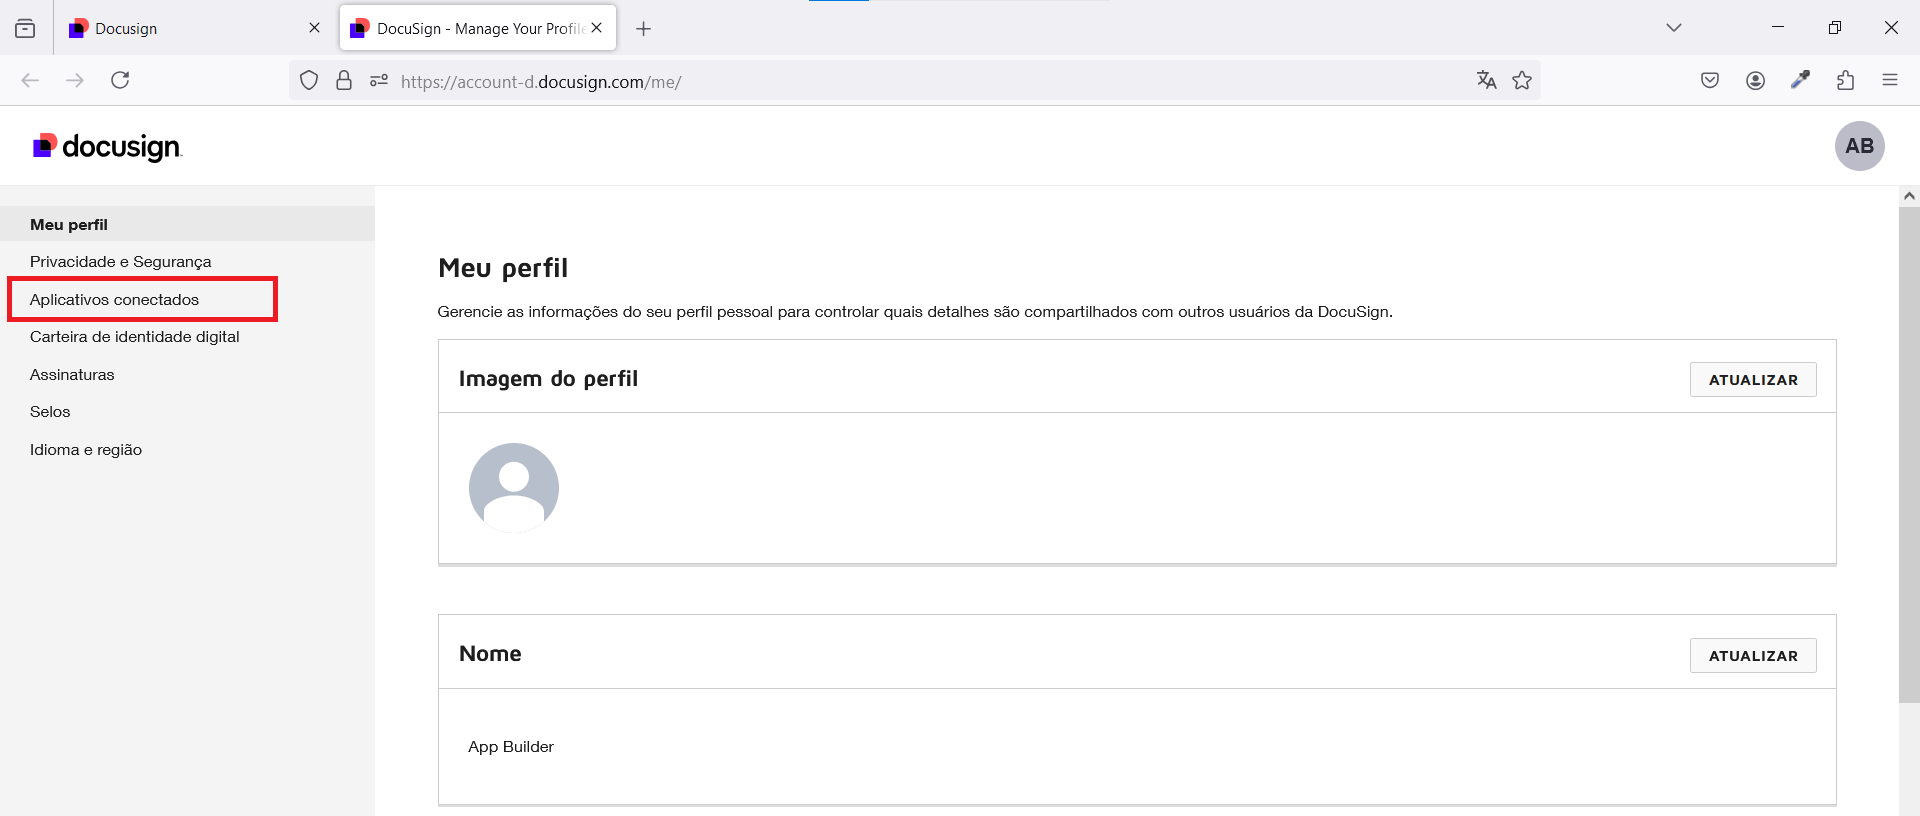
If you want to revoke the consent to your app, go to your DocuSign home page, click on your profile picture, and then in the Manage Profile option.
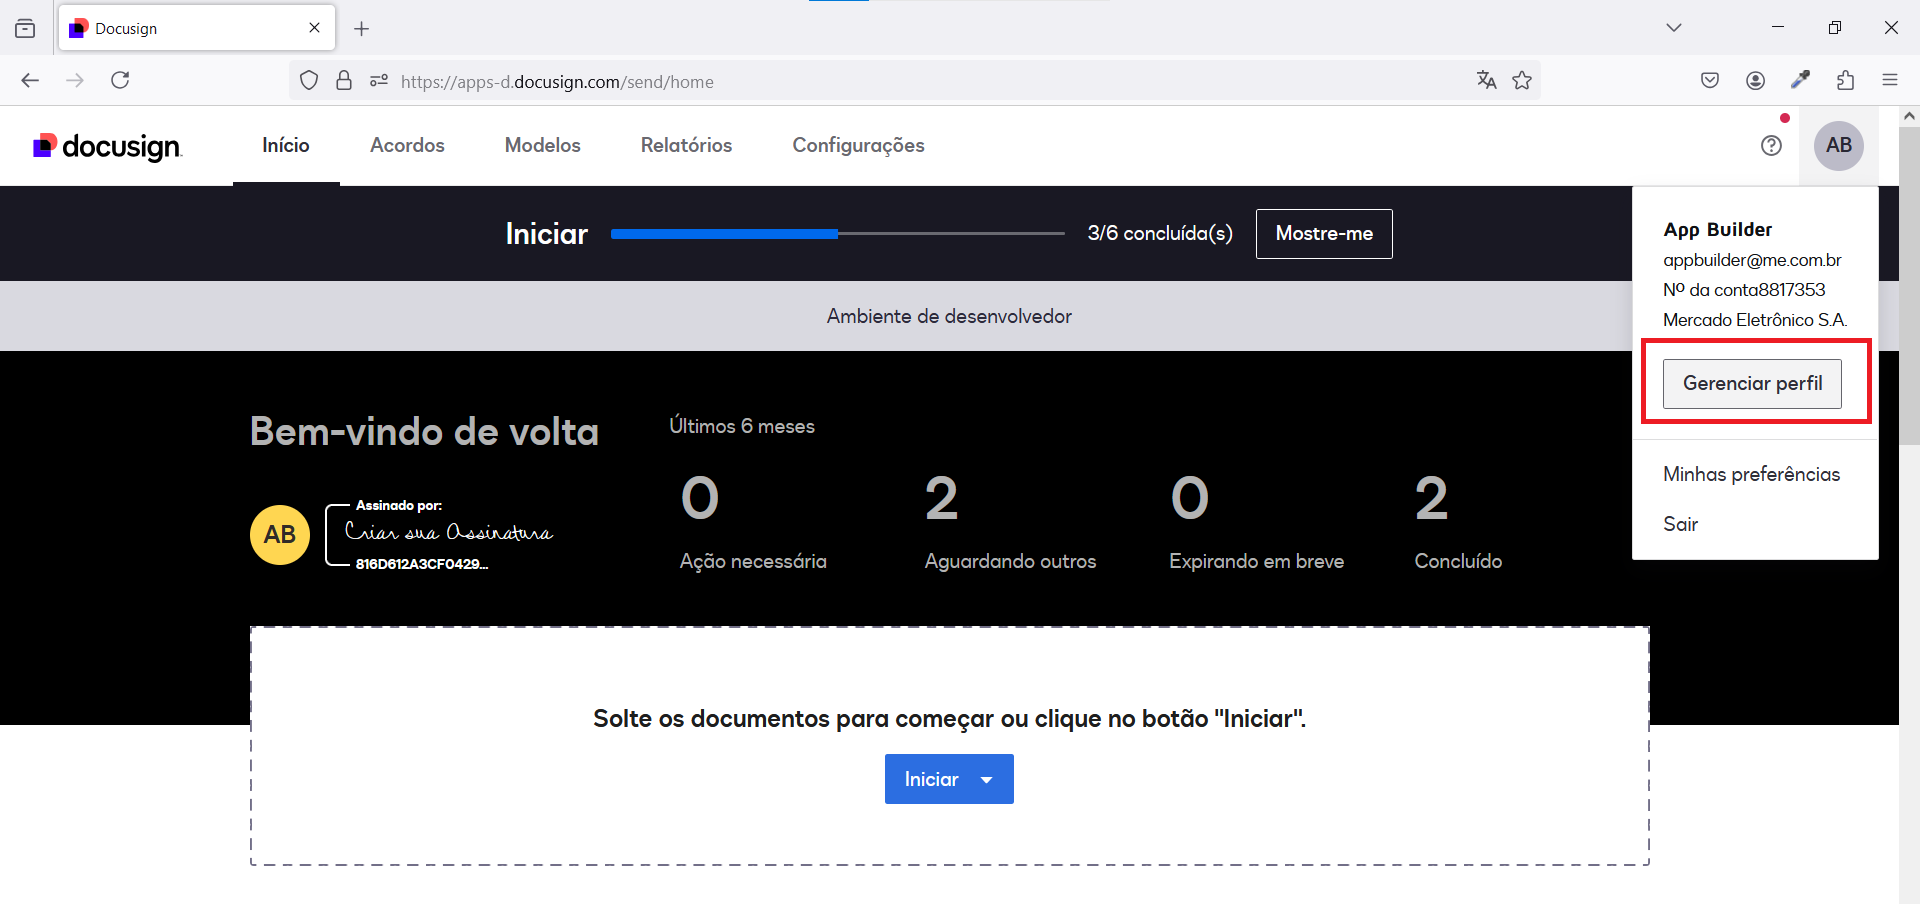
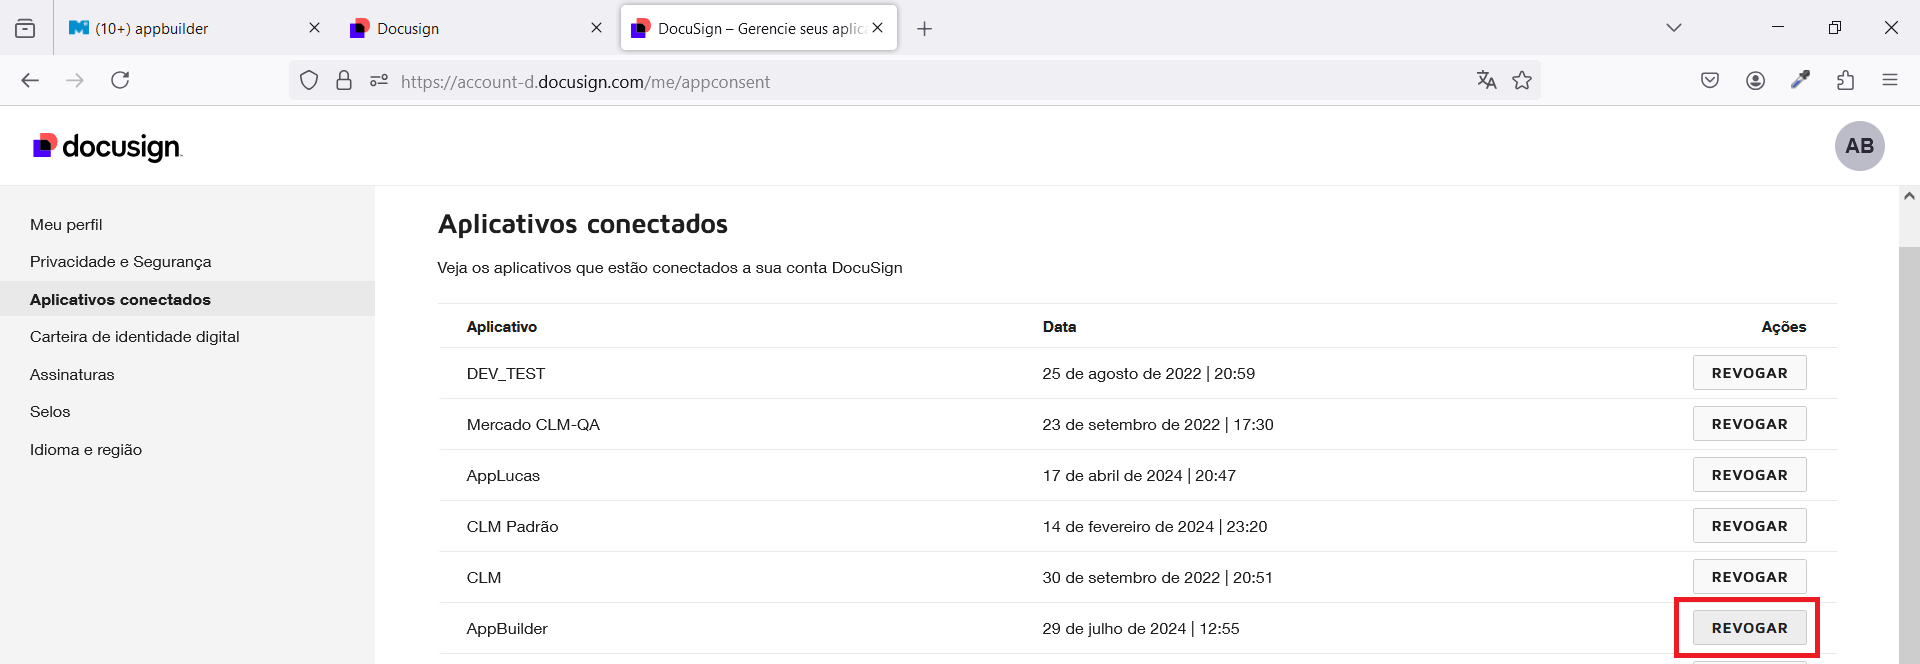
Go to the list of Connected Apps and revoke access to your app.